
How to tie a scarf for beginners comes down to two things: picking a knot that matches your scarf fabric, and keeping the first wrap simple so it sits comfortably instead of fighting your outfit.
If you have ever tried a “cute” scarf tutorial and ended up with a bulky lump at your neck or a knot that slips loose the moment you move, you are not alone. Most beginner frustration is less about technique and more about choosing a tie that does not suit the scarf you grabbed.
This guide focuses on a small set of reliable knots you can repeat, plus quick fit checks so you can tell when to tighten, loosen, or switch styles. You will also find a simple table that matches common scarf types to beginner-friendly ties.
Key takeaway: start with one or two “default” knots, then adjust based on scarf thickness and the neckline of your top. That alone fixes most beginner issues.
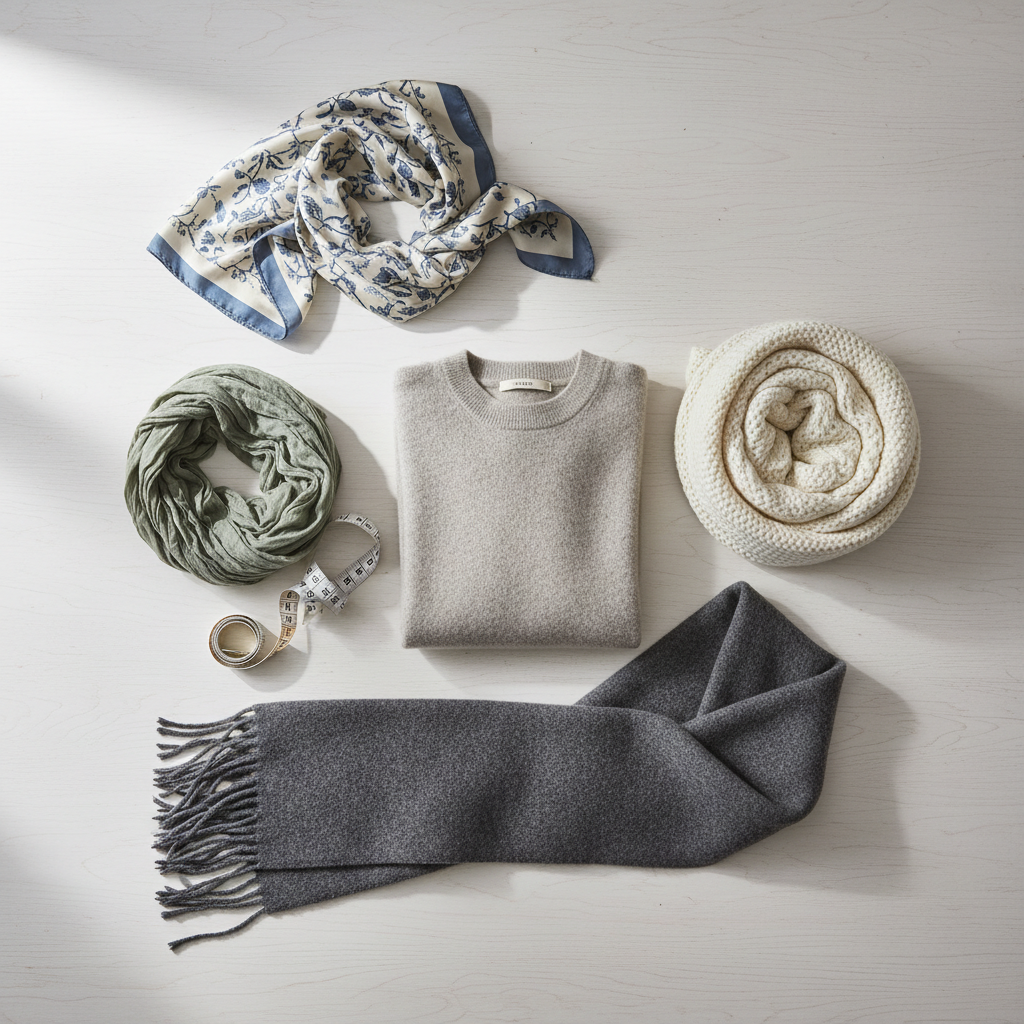
Start with the right scarf: size, fabric, and “bulk”
Before you learn five different knots, it helps to know what you are tying. A knot that looks sleek in silk can feel like a neck brace in chunky knit.
- Long rectangle (most common): easiest for beginners, works with almost every knot.
- Square scarf (often silk or satin): best for small knots and neat folds.
- Chunky winter scarf: needs low-bulk ties, fewer wraps, and more “drape” than “knot.”
According to CDC (Centers for Disease Control and Prevention), cold exposure can be dangerous in extreme conditions, so in genuinely cold weather your scarf choice is not only style, it is coverage and warmth. If you have breathing issues or neck discomfort, keep wraps looser and consider asking a clinician what is appropriate for you.
Quick scarf-to-knot match (beginner cheat sheet)
| Scarf type | Best beginner ties | What to avoid early on |
|---|---|---|
| Lightweight long scarf (cotton/modal) | Classic drape, Simple loop, European knot | Over-wrapping (it slides) |
| Wool blend long scarf | European knot, Once-around tuck | Double knots (adds bulk fast) |
| Chunky knit blanket scarf | Loose drape, Belted wrap | Tight loops (too thick) |
| Silk square | Neck wrap with small knot, Triangle drape | Big “bow” knots (slips, wrinkles) |
A 30-second self-check: why your scarf looks “off”
Most people searching how to tie a scarf for beginners are really asking, “why does mine never look like the photo?” Use this checklist before you re-tie it five times.
- Too puffy at the neck: scarf is thick, knot is too complex, or you wrapped twice when once would do.
- Knot keeps sliding: fabric is slick, or your knot has no friction point; choose a simpler tie or add one extra tuck.
- Ends are uneven: you started off-center; fix by aligning ends first, then knot.
- Looks “messy” on camera: folds are not flat; take 5 seconds to smooth the front panel.
- Feels tight or distracting: loosen the first wrap; comfort matters more than symmetry.
If you only remember one rule, make it this: the first wrap sets the shape. If the wrap sits too high, too tight, or too thick, no “fancy” finishing step will save it.
3 beginner scarf knots that work with most outfits
These are the ties you can repeat without thinking. They also photograph well and do not demand a perfect scarf length.
1) Classic drape (no knot)
This is the easiest “tie,” and it is underrated. It looks intentional when the scarf fabric has some structure.
- Fold the scarf in half lengthwise if you want less width.
- Place it around your neck so both ends hang evenly.
- Smooth the front and let it sit; adjust by pulling one end slightly lower for a relaxed look.
Best for: open coats, cardigans, simple sweaters. Not great for: windy days unless you add a tuck.
2) Simple loop (one wrap, ends in front)
If you want warmth without bulk, this is the “default” for beginners.
- Drape scarf evenly around your neck.
- Take one end and wrap it once around your neck.
- Bring both ends to the front, then even them out by tugging the shorter side.
Fix for slipping: after the wrap, tuck one end under the loop at your collarbone so it catches.
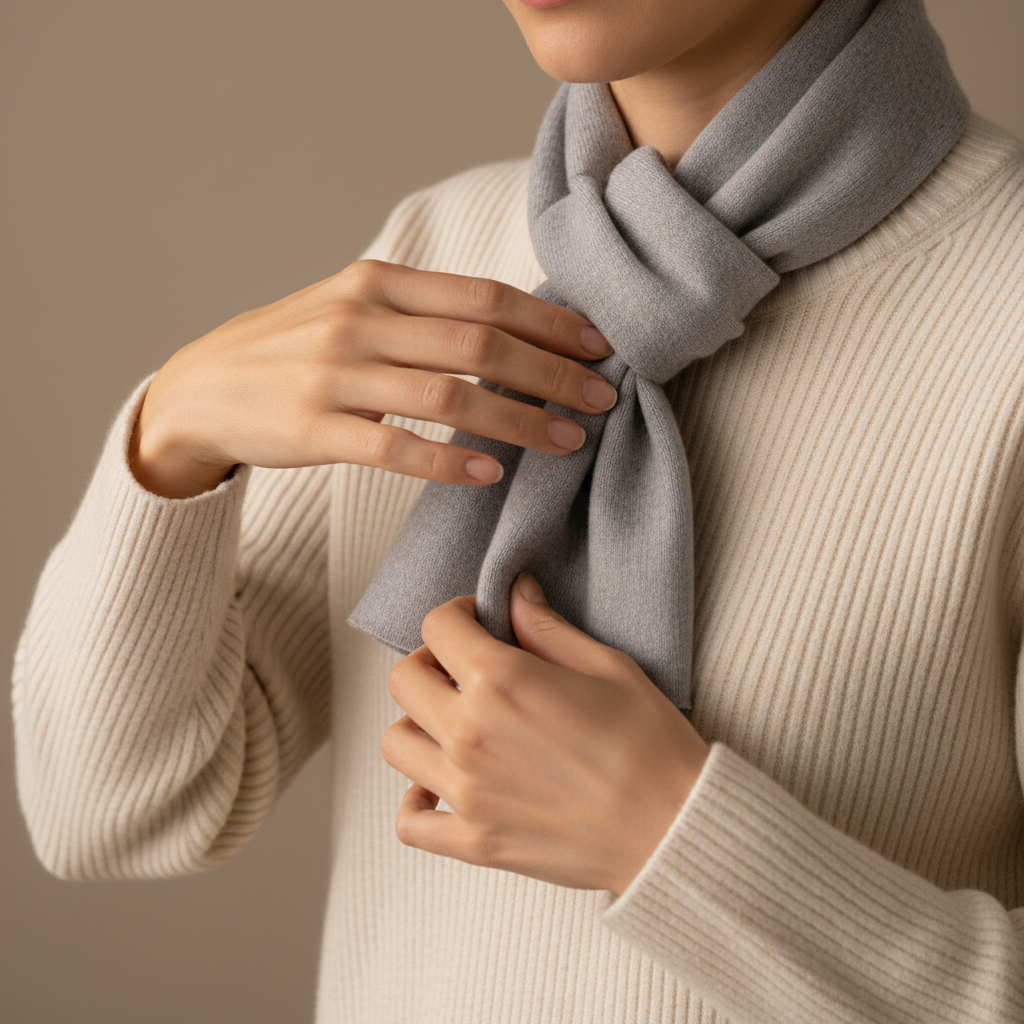
3) European knot (fold-and-pull)
This is the neat, “polished” look that stays put, and it is one of the most searched variations of how to tie a scarf for beginners.
- Fold the scarf in half so you have a loop on one side.
- Place it around your neck with the loop on one side, ends on the other.
- Pull the two ends through the loop.
- Tighten slightly, then loosen a touch for comfort and shape.
Pro tip: keep the loop low on your chest if your scarf is thick, it reduces the “neck lump” effect.
How to tie a scarf for beginners by neckline (this matters more than people admit)
The same knot can look great over a crewneck and weird over a hoodie. Match the scarf shape to the space your neckline gives you.
- Crewneck: European knot or simple loop, keep the knot slightly off-center if your face feels “boxed in.”
- V-neck: classic drape or once-around tuck, let the scarf form a soft “V” to echo the neckline.
- Turtleneck: avoid tight wraps, go for a loose drape or a low European knot.
- Button-down collar: lighter scarf, smaller knot, and keep bulk below the collar point.
- Hoodie: wrap once and keep ends long, or wear the scarf outside the hood for less bunching.
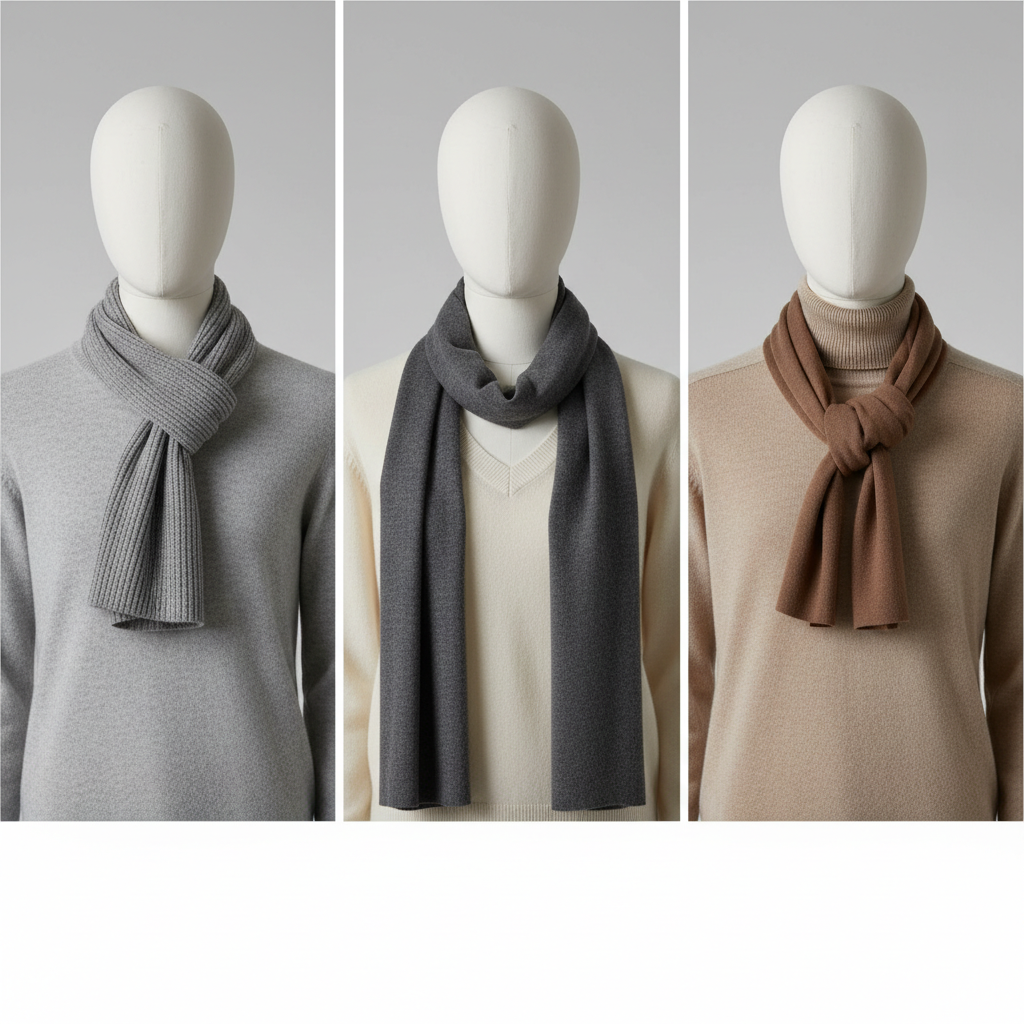
Many beginner “fails” are really a neckline mismatch. If you feel like your scarf is swallowing your face, try lowering the knot and reducing one layer of fabric near your jaw.
Practical tweaks that make any scarf knot look better
You can tie the right knot and still feel like it looks flat. Usually the fix is not a new knot, it is a small adjustment.
- Flatten the front panel: run your fingers along the visible section so it lies smooth, especially with silk and satin.
- Control length on purpose: even ends read “classic,” uneven ends read “relaxed.” Pick one, do not land in the middle by accident.
- Shift the knot 1 inch: slightly off-center often looks more natural and feels less tight.
- Use layering: scarf under coat for warmth, scarf over coat for style and volume control.
- Think friction: slippery fabric needs more tucking, textured wool needs less.
Quick rule: if you are adjusting more than 20 seconds, switch to a simpler tie. The “beginner win” is consistency, not complexity.
Common mistakes beginners make (and what to do instead)
There are a few patterns that show up again and again when people learn how to tie a scarf for beginners.
- Copying a knot without matching the scarf: if the tutorial uses a thin scarf and yours is thick, pick a low-bulk tie.
- Over-tightening for symmetry: tight knots look forced and feel worse, loosen and let gravity help.
- Ignoring coat shape: puffer jackets need simpler knots, tailored coats can handle a cleaner knot at the chest.
- Forgetting wind: in windy weather, choose a knot that tucks ends in, or put ends inside your coat.
- Too many layers near the throat: if you feel warm but irritated, drop one wrap and use a longer hang.
Safety note: if you work around machinery or activities where fabric can snag, keep scarves short, tucked, or avoid them. When in doubt, follow workplace safety rules and consider a neck gaiter instead.
Putting it into practice: a simple 7-day plan
Beginners learn faster when the goal is repetition, not variety. This plan keeps it realistic.
- Days 1–2: wear the classic drape, learn how scarf length and fabric behave.
- Days 3–4: use the simple loop, practice getting comfortable tension.
- Days 5–6: use the European knot, focus on keeping the loop low and neat.
- Day 7: choose the best one for your usual outfit, take a quick mirror photo so you remember what worked.
If you want one “starter kit” approach, pick one lightweight scarf and one midweight scarf. Mastering those two covers most seasons in many U.S. climates, though weather varies a lot by region.
Conclusion: keep it simple, then make it yours
If your goal is to feel confident fast, treat how to tie a scarf for beginners like learning a reliable routine: use one scarf type, repeat two knots, and adjust for comfort and neckline. Once those basics feel automatic, you will find it much easier to experiment without ending up with extra bulk or a slipping knot.
Action step: pick a scarf you wear often, practice the simple loop and the European knot back-to-back, then decide which one looks best with your most common coat.
FAQ
- What is the easiest way to tie a scarf for beginners?
Start with the classic drape or a simple loop. They require minimal folding and still look intentional with most casual outfits. - Why does my scarf knot look bulky?
Usually the scarf is thicker than the knot style expects, or you wrapped too many layers near the neck. Switch to a low knot position or use a single wrap. - How do I keep a scarf from slipping off my neck?
Use a knot with a “lock,” like the European knot, or add one tuck under the loop at your collarbone. Slippery fabrics often need that extra friction. - How tight should a scarf be?
Snug enough to stay in place but loose enough to breathe and turn your head comfortably. If you feel pressure at the throat, loosen or drop a wrap. - Can beginners wear a scarf with a hoodie?
Yes, but keep it simple. A single wrap with ends in front usually sits better than a complex knot, and it reduces bunching around the hood. - How do I tie a square silk scarf without it looking messy?
Fold it into a triangle, then into a narrower band, and use a small knot slightly off-center. Smoothing the visible fold makes a bigger difference than adding a fancy bow. - Is it okay to wear a scarf while exercising or working?
It depends on the activity. For workouts or environments with snag risks, a scarf may be unsafe; consider alternatives and follow workplace guidance.
If you are still experimenting and want a more “no thinking required” setup, it often helps to build a tiny rotation around two scarf weights and two go-to knots, you spend less time re-tying and more time actually wearing the look.