how to apply highlighter like pro starts with one simple goal, make light look like it belongs on your skin, not sitting on top of it.
If your highlight keeps turning into a shiny stripe, clinging to texture, or disappearing after an hour, it’s usually not “bad highlighter”, it’s placement, product choice, or the base underneath.
This guide walks through the exact decisions pros make, which formula to pick, where to place it on different face shapes, how to blend without lifting foundation, and how to keep the glow realistic in daylight and on camera.
Pick the right highlighter for your skin type and finish
The most “pro” highlight usually looks boring in the pan, not chunky, not overly metallic, and not packed with visible glitter. Texture and base matter more than the shade name.
Formula cheat sheet
- Cream: best for normal to dry skin, melts in, easier to look like skin, can move base if you rub too hard.
- Liquid: great for mixing into foundation or tapping on high points, can go dewy fast on oily zones.
- Powder: easiest to control on oily skin, best for setting a cream highlight, can emphasize texture if too dry or too sparkly.
According to the American Academy of Dermatology (AAD), daily sun protection helps reduce visible signs of photoaging, which also affects how makeup sits on the skin, so SPF under makeup often improves the long-term “smooth glow” look.
Match the shade to undertone, not just skin depth
Wrong undertone is a big reason highlight looks gray, icy, or too yellow. When the undertone fits, you need less product, and that’s where the “lit-from-within” vibe comes from.
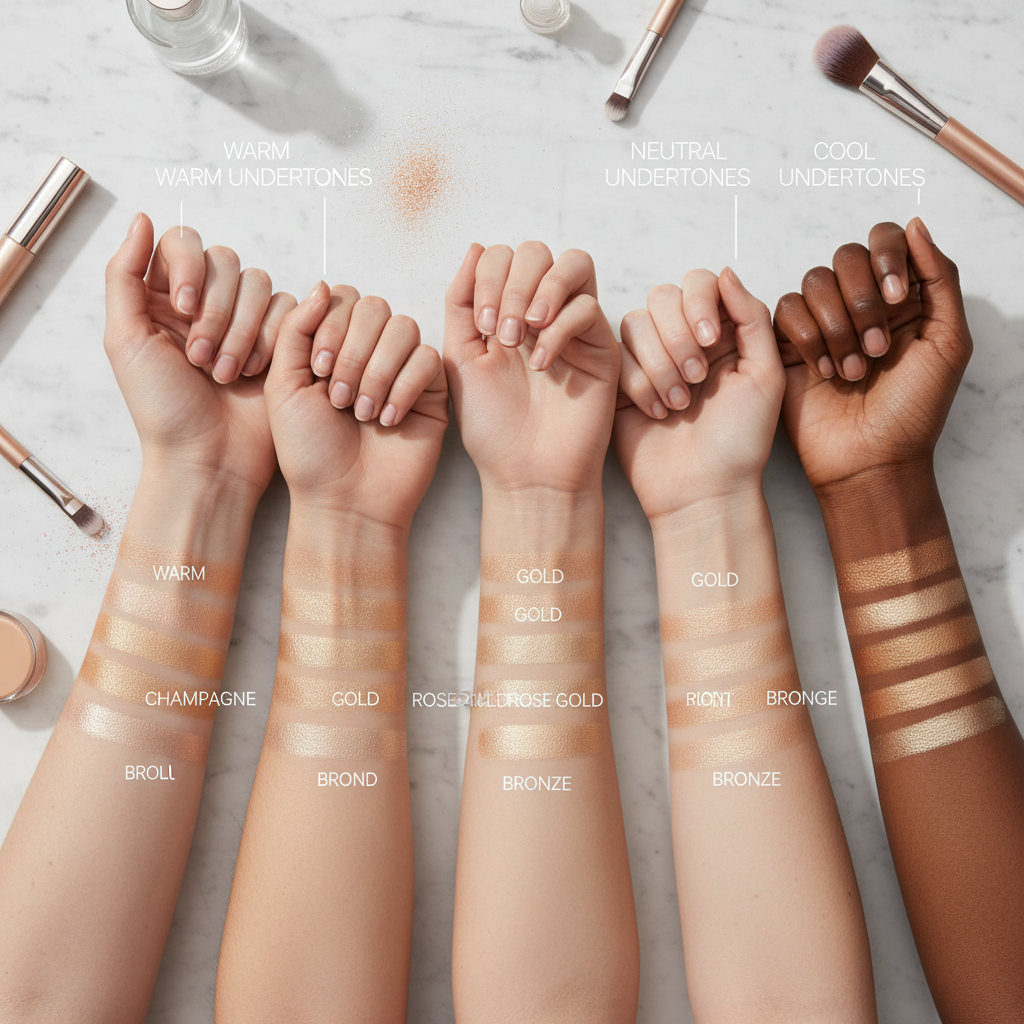
Quick undertone guide
- Cool: pearl, icy champagne, soft pink.
- Warm: golden champagne, peach-gold, soft bronze.
- Neutral: true champagne, beige-gold, rose champagne.
- Deep skin tones: avoid ashy pearls, look for rich gold, copper, bronze, or warm rose tones with a smooth sheen.
If you’re torn between two options, choose the one with finer shimmer and a shade closer to your skin, you can always build intensity without it reading “stripy”.
Prep matters: a smooth base makes highlight look expensive
Highlighter catches light, and that means it also catches dryness, heavy powder, and texture. You don’t need perfect skin, but you do want the high points hydrated and not overly set.
Base steps that usually help
- Moisturizer on cheekbones and temples, give it a minute to settle.
- Primer only where you need it, pore-blurring on T-zone, hydrating on cheeks.
- Foundation in thin layers, heavy coverage can make highlight sit on top.
- Powder strategically, keep the cheekbone top less powdered if you plan to use cream or liquid.
If you deal with irritation, acne, or sensitivity, new products can cause a reaction for some people, patch testing and, when needed, checking with a dermatologist is a safer move than forcing a trendy formula.
Placement: where pros put glow (and where they don’t)
How to apply highlighter like pro is mostly about restraint and location. The best placement mimics where light naturally hits, then stops before it reaches areas that show texture.
Core placement map
- Cheekbones: tap on the top edge, start near the outer cheek, blend inward only halfway.
- Temple: a thin veil connecting cheekbone to temple looks modern and lifted.
- Brow bone: optional, keep it subtle to avoid a frosty look.
- Inner corner: tiny touch for bright eyes, especially with matte shadows.
- Cupid’s bow: works for some, but can emphasize upper-lip texture, go light.
- Nose: use two micro-dots, bridge and tip, then blur, avoid a full stripe.
Areas pros often skip, center of cheeks with visible pores, any active breakouts, and the deepest smile lines, highlight tends to “announce” those zones.
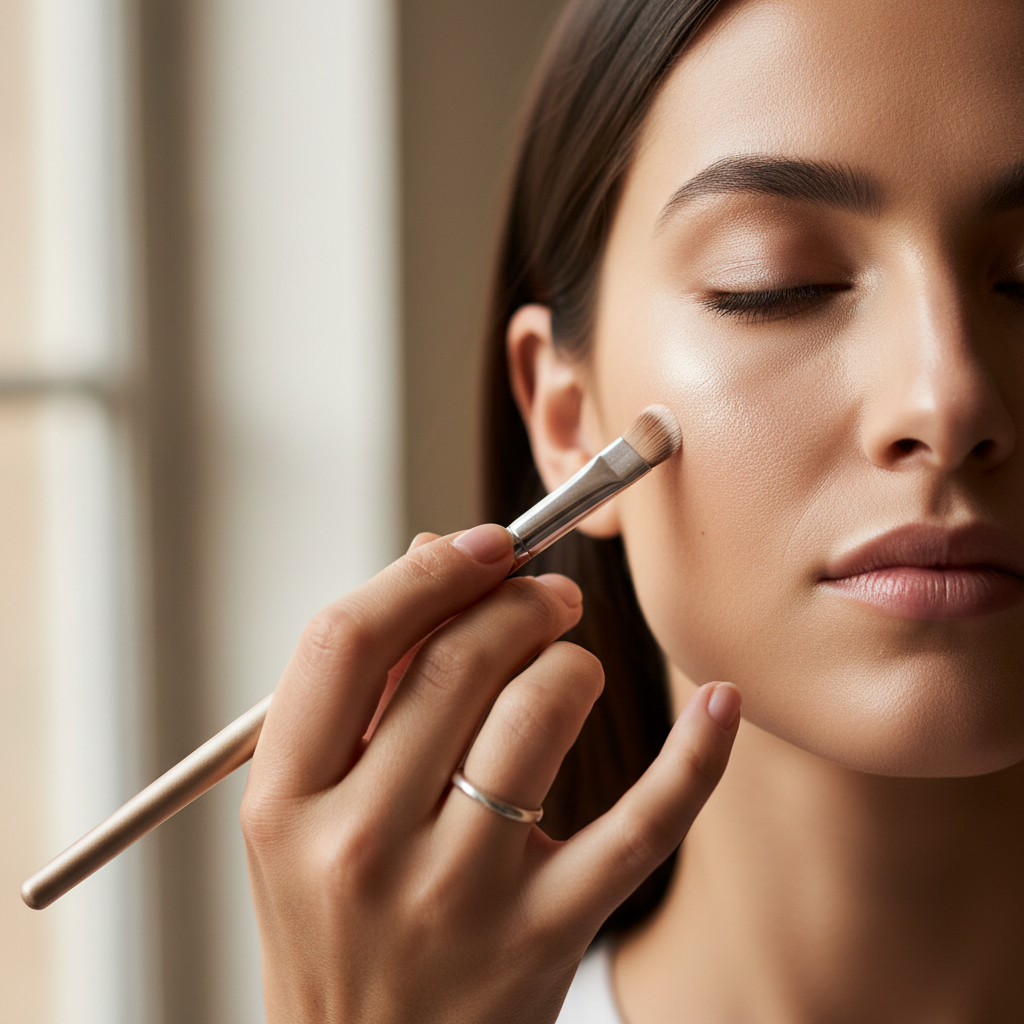
Tools and technique: tap, don’t swipe
Most highlight mistakes come from dragging product across foundation. Tapping keeps the base intact and builds glow in a controlled way.
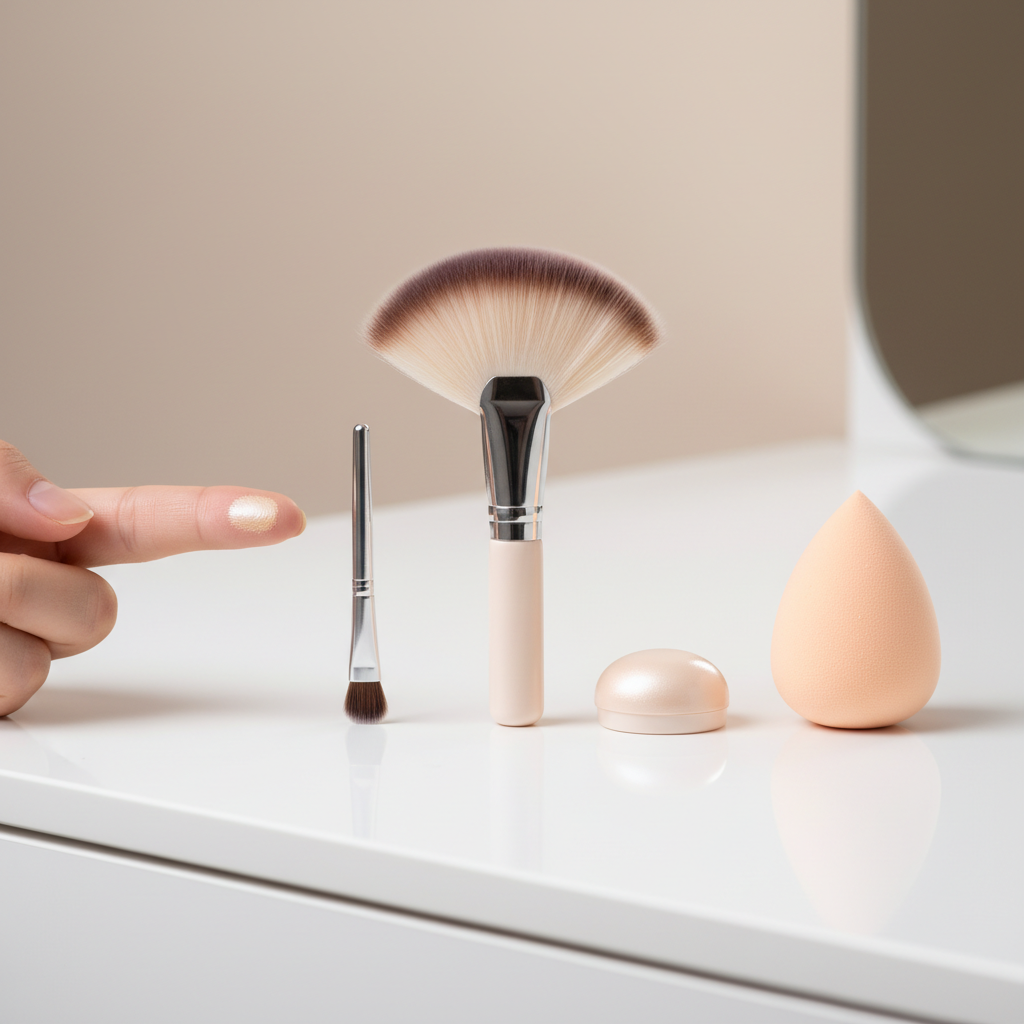
Best tool for each formula
- Cream: fingers (warmth melts), or a damp sponge for the softest edge.
- Liquid: sponge or small duo-fiber brush, apply in tiny dots then tap out.
- Powder: small tapered brush for precision, avoid big fluffy brushes that over-spread shimmer.
Technique that reads “professional”
- Pick up less product than you think, then build.
- Place it, then blend the edges outward and upward, not down toward the mouth.
- If you overdo it, press a clean sponge over the area to soften, don’t add more powder.
Step-by-step: natural glow vs. glam spotlight
Two looks, same placement, different intensity. The trick is layering, not loading a single thick coat.
Everyday “skin glow” (5 minutes)
- Use a cream or liquid in a skin-close shade.
- Tap a pea-size amount across both cheekbones, then blend with a damp sponge.
- Add a tiny touch to the temple and inner corner.
- If you want more, add a whisper of fine powder highlight on top, only on the highest point.
Glam “spotlight” (still wearable)
- Start with cream highlight as a base layer, keep edges clean.
- Top with powder using a small tapered brush, concentrate on the peak of cheekbone.
- Add a controlled nose highlight, then blur with a clean brush.
- Finish with setting spray, then tap once with sponge to remove any harshness.
If you’re practicing how to apply highlighter like pro for photos, check your look in a window and under overhead lighting, what feels subtle in one can look intense in the other.
Troubleshooting: fix the most common highlighter problems
Here’s the stuff that makes people give up on glow, plus what usually works without starting over.
| Problem | Why it happens | Fix |
|---|---|---|
| Harsh stripe on cheek | Too much product, wrong brush, not enough blending | Press with clean sponge, add a touch of blush over edge, then re-tap highlight lightly |
| Emphasizes pores/texture | Chunky shimmer, too much powder, placement too low | Switch to cream or fine sheen, keep highlight on outer top cheekbone, reduce setting powder there |
| Looks oily instead of glowy | Warm lighting, dewy base, highlight placed on T-zone | Use satin formula, set center face, place glow higher and farther out toward temple |
| Highlight disappears | Base too emollient, no layering, oil breaks through | Layer cream + powder lightly, use setting spray, blot then reapply with a small brush |
| Face looks “flat” even with highlight | No contrast, missing blush/bronzer, shade too close | Add soft blush, a touch of bronzer, then highlight the peak only |
Key takeaways you can use today
- Placement beats price, keep glow on the high outer planes of the face.
- Tap, don’t swipe, especially over foundation and concealer.
- Finer shimmer looks more “skin”, glitter reads obvious fast.
- Layer for longevity, a thin cream under a light powder can last longer than either alone.
- Check your highlight in more than one light source before you leave the house.
Conclusion: a pro highlight is mostly restraint
How to apply highlighter like pro comes down to three habits, choose a smooth formula, place it where light naturally hits, then blend until you can’t see where it starts. If you try one change this week, make it this, use half the product and spend twice the time softening the edges.
Grab a mirror, test your placement in daylight, and take one quick photo, it’s the fastest way to spot a stripe before it becomes your whole makeup look.